Sunday, November 26, 2006

Havin' a ball!


At the conclusion of each of the three high school sports seasons The Pueblo Chieftain newspaper (where I am a staff photographer) honors one athlete from each sport in a feature we call “Playmakers”.

The kids chosen for this honor aren’t necessarily the top athlete in their sport, but are chosen for their role model qualities, ie: sportsmanship, leadership, and dedication to their teammates and fellow students. All in all, these are the kids you would want YOUR kids to look up to, or even become.

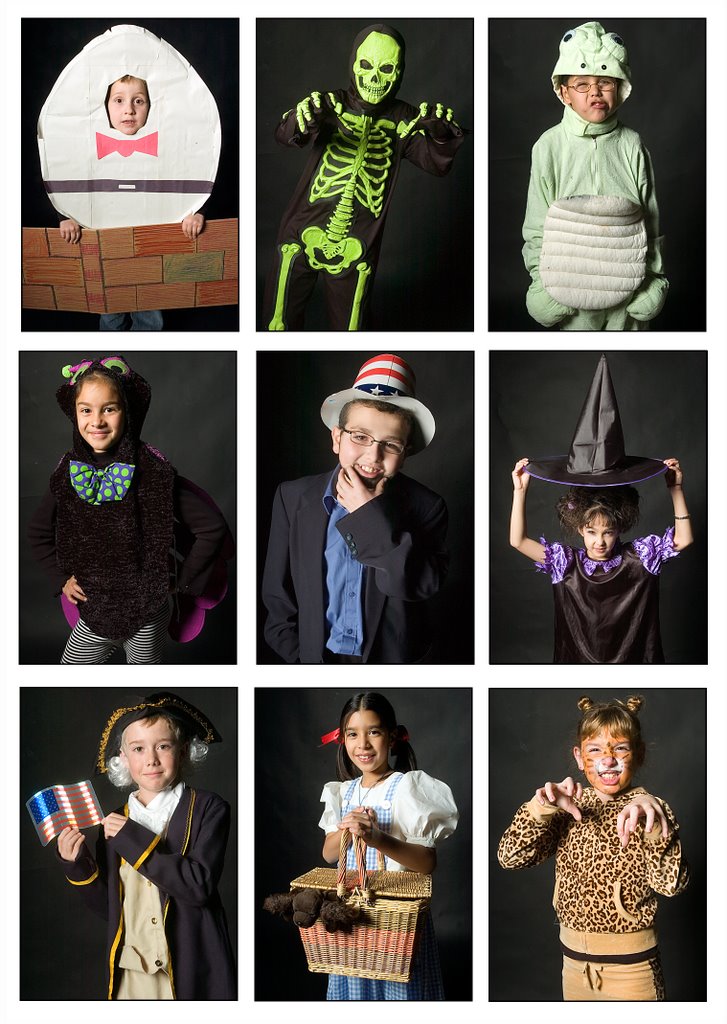
Originally this assignment was put together to be a group photo of all the athletes at once. For the fall seasons that is a group of nine kids. Kind of tough to shoot in a small studio at the paper.

After that first season I suggested that maybe we could shoot individual portraits of each kid for the “Playmakers” feature. So, since it was my idea (and I was the one to open my big mouth) I was given the assignment to do these portraits.

At first I thought it was going to be a bit more than I was willing to tackle, but as it has turned out, I have thoroughly enjoyed the assignment each time I have gotten it. I get a chance to meet some very cool kids and do some pretty fun stuff as far as portraits go.

This past season boys tennis was on the list of sports and I got to do one of the things I enjoy most, to bury my subject. I buried this local tennis player in hundreds of tennis balls and I think he may have had just as much fun as I did. His dad was a great help as well. He helped me dump basket after basket of tennis balls on his son.

I built a round container from the end of a roll of newsprint that I found near the pressroom at the paper. I used some gaffers tape to reattach the sides leaving an opening for my subject’s legs. I got lucky and picked something that was just the right size to bury the kid, but we did have to use every practice tennis ball available in the local country club to do it!

After burying him I placed a chair next to him stood on it and held my camera out over him to shoot straight down on him. It was hit and miss at first, then I was able to get him to move ever-so-slightly allowing me to get the image I wanted without any of the edge of the container visible in the frame.


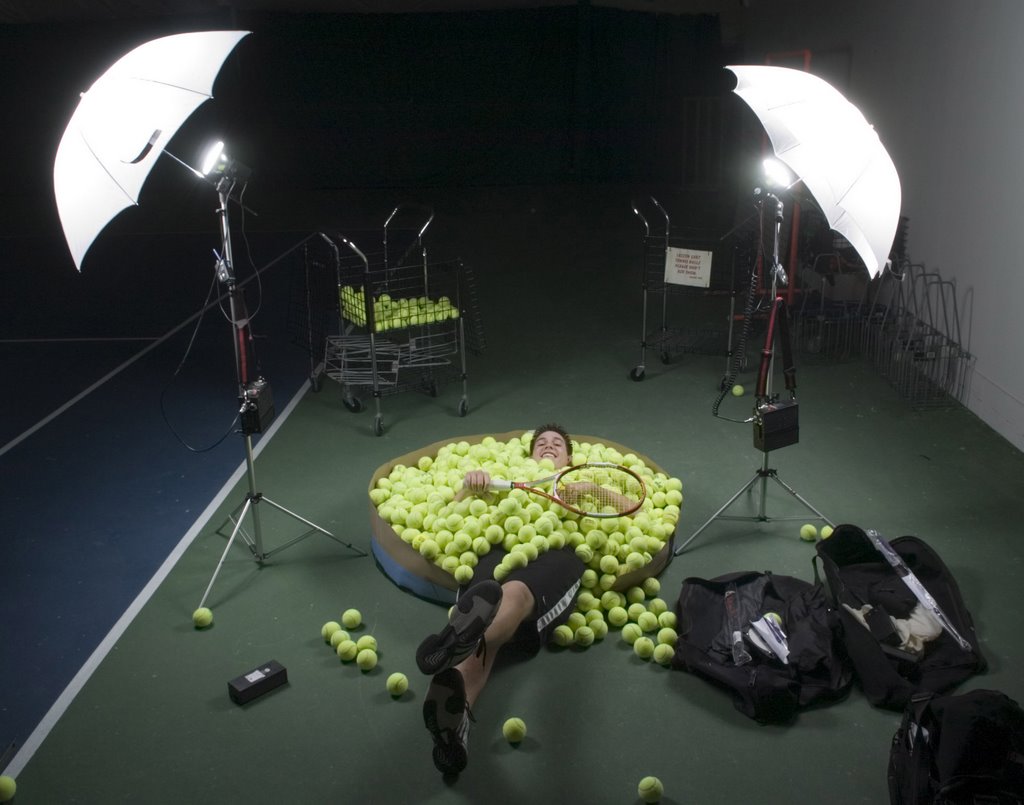
As you can see in the setup photo, I used two Lumedyne 400w/s heads on stands with umbrellas to give me balanced light and good depth of field. This was one time when I WANTED everything in the frame to be in focus. I triggered the strobes with two Pocket Wizard receivers and a PW transmitter on the camera. My camera for this one was a Nikon D2H with a 20-35mm f2.8 lens. It is a good workhorse camera for daily newspaper work. If I had been shooting this for any other type of publication I would have used a camera with a bigger CCD.

All in all the set up did what I wanted it to and I got a fun photo. I always see things that I may have done a little better or just a shade differently to make for a stronger image and I will make some mental notes (maybe a few paper ones too) and if I decide to bury someone in something again I will be more prepared.

It may have been a cliché image, but that is okay. Sometimes the subject matter calls for it. And if it calls again, I may just answer....Til next time.

Monday, November 20, 2006

My Composite Panorama


(The view from Hoosier Pass on Highway 9 just south of Breckenridge, Colorado)

I have always enjoyed panoramic images. I have never put a lot of effort in to making panoramic images myself as I found that the cameras were a specialized piece of photographic gear that I may only use every-so-often.

However, recently I have seen more and more panoramic images that have been done with standard SLR-type cameras. The photographer shoots a series of images and them puts them together to create a composite panorama in Photoshop.

I have made a composite or two in the past with photoshop, but nothing where there was a complex image involved. I am still very impressed by photographers who make this type of image on a regular basis and can pull it off in such a way that no one is the wiser.

This past Saturday I was on the road taking my two sons to Vail for a youth hockey tournament. The sun was shining, the sky was blue and we were way ahead of schedule, so when I neared the top of Hoosier Pass on Highway 9 I started thinking about getting out and shooting a photo or four.

I drove past two of the pull-offs where people regularly stop to take photos of friends and family with a spectacular background west of the pass. I got to the top of the pass and realized that I needed to turn around and head back to one of the lower spots. My turnaround and drive in the opposite direction was met with questions from the back seat “What are we doing daddy?”.

I just told my boys that I wanted to go back to a spot we had passed to take a photo and that we would still get to the hockey tournament in plenty of time. The response was, “Oh, okay.” It is always good to get permission from your kids before stopping to shoot photos...Ha!

I parked, got out, and at first tried to get the photo that I wanted in one frame. It was okay, but the whole scene wasn’t going to fit into one 28mm frame. I also figured that it wouldn’t look the way I wanted it to if I used my 10.5mm lens. I don’t like to have the trees on the edge of the frame bending over like they are blowing in a hurricane when I am trying to shoot a scenic image.

It occurred to me that I could shoot several images of the scene and when I got home I would drop them into Photoshop and see what I could do to put them together into a decent composite.

I ended up using four images that I shot from left to right of the scene. I overlapped them so as to have a good choice of connection points. I shot the photos at a 320th of a second at f/8 using a film speed rating of 100ASA with my 20-35mm lens zoomed to 28mm.

I still have a lot to learn about doing this, but after spending about 90 minutes playing with the images I was able to come up with an image that did what I wanted it to.

If you have any suggestions on panoramic methods I would love to hear them. In the meantime I will continue to research the technique. Til next time...

Thursday, November 16, 2006

Picturing Halloween


(©2006 The Pueblo Chieftain/Bryan Kelsen)

I realize that Halloween is over and I apologize for the delay on my blog posting. I won’t give any excuses except to say that there just aren’t enough hours in a day to get everything I want to crossed off my list of “Things To Do”.

I got to do something that I had always wanted to do. I tried my hand at light painting. I did it for an assignment where I had to photograph a group of jack-o-lanterns prior to Halloween. The Lifestyle department decided to get some local artists to carve up some pumpkins and then we’d photograph them for a cover page.

I was given the assignment and saw my chance to give light painting a try. I am still learning, and have by no means become an expert by experimenting the one time on a few pumpkins. I am a big fan of photographer, Dave Black, who has done some pretty amazing things with light painting. I go to his website (www.daveblackphotography.com) often to get ideas and see what he has been up to. I have gotten some great information there. I would recommend his site to photographers at any level.

The final photo is actually a composite of four images. I photographed each jack-o-lantern individually and then put them together in photoshop and added the text. Each time I put a battery-operated touch light inside the jack-o-lantern so that I would have a glow from the inside without using candles and burning down The Chieftain.

After placing the touch lights inside of the carved pumpkins I used a penlight to light paint each jack-o-lantern while the camera was set at an ASA of 200 for a 20 second exposure at f/8 or f/11. I learned a lot while light painting in the paper’s studio that afternoon. Trial and error are great teachers. The first thing I learned was that I should have had a bigger light source. The penlight is great if you are doing small subjects, but for anything bigger than a baseball a bigger light makes it a LOT easier. I also learned that it helps to have complete darkness while the shutter is open and that it is a good idea to avoid walking in front of the lens while the source of the light painting is turned on. It leaves nasty little streaks.

All in all it was a fun experiment that worked just fine. Unfortunately I didn’t get much in the way of a page design for the image. The text on the photo was something that I added, it never made it into the paper that way. But hey, I like it.


(©2006 The Pueblo Chieftain/Bryan Kelsen)

This second image was an idea that I borrowed from a photographer who shot portraits of finishers at the NYC marathon for Sports Illustrated. I really enjoyed taking them and I think the kids got a kick out of being photographed. Hopefully I will get to shoot the same sort of thing next Halloween. Stay tuned!